Getting Started with Google Analytics Event Tracking in Tag Manager 2020
Google Analytics event tracking gives you endless possibilities to track clicks, scrolls, form submits and many other behaviors as “events” that can get passed to your Google Analytics property for review. Implementing Google Analytics event tracking can be tedious, especially if you are using in-line event code snippets throughout the site (we wrote a whole blog post on traditional event tracking).
So why is event tracking through Google Tag Manager (GTM) so much better?
For starters, it significantly cuts down on development time. Once the initial setup of the Tag Manager is completed, there is no more code to add to the site for tracking! Here are a few other reasons why event tracking through Tag Manager is the way to go:
- Less code on-page.
- With conditional triggers, you can fire your event tags on certain pages so the event tracking code is not on every single page.
- Easily track outbound link clicks.
- Create a link click trigger that fires on “some link clicks” where the Click URL does not contain your root domain. Pro Tip: Add the {{Click URL}} and the {{Page Path}} variable to the Action or Label of your event so you know what external URL was clicked and from which page of your website.
- Create templates for all of your websites or client properties.
- By exporting the JSON file of your container in the admin settings, you can edit the dynamic fields, such as Analytics ID or domain name, in a text editor and import the container settings to another (more on this later).
Here’s the play by play for getting started with GTM event tracking:
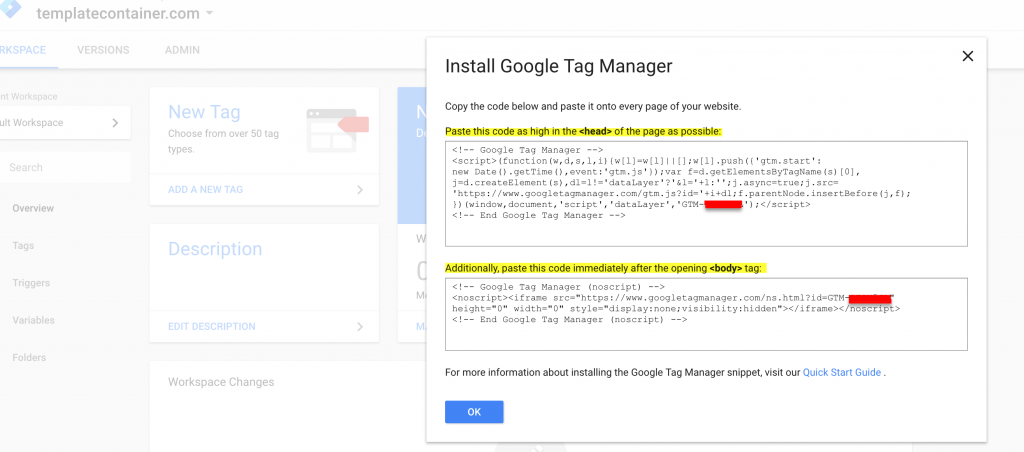
1. DEPLOY GOOGLE TAG MANAGER TO YOUR WEBSITE.
Add Google Analytics to Tag Manager, firing on all pages. If you prefer to keep Google Analytics outside of Tag Manager due to your gtag.js setup, Google Optimize speed, or for any other reason, just make sure that your events fire after your base analytics script loads.

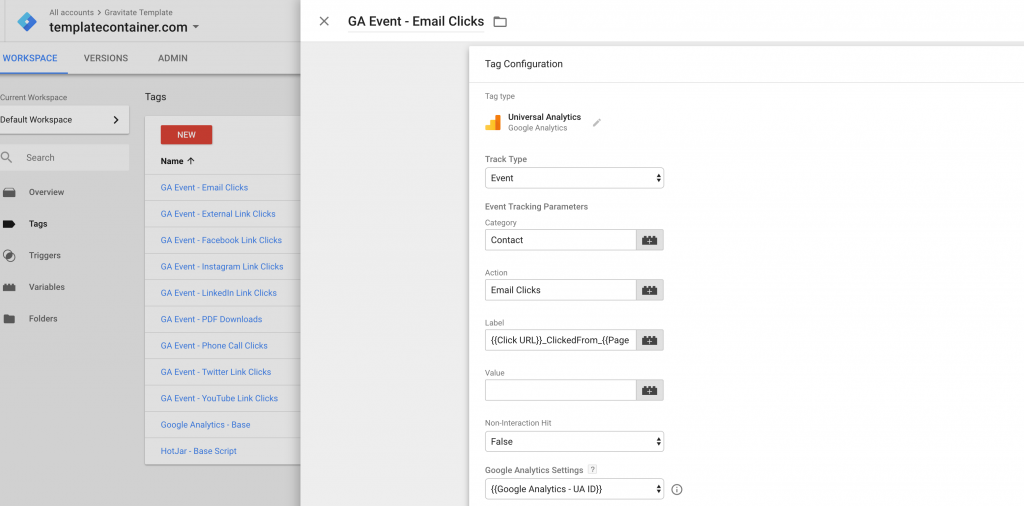
2. CREATE EVENT TRACKING TAGS.
Make sure to think through how you would like to name your events by giving each parameter a name that makes sense for your tracking. See example below:

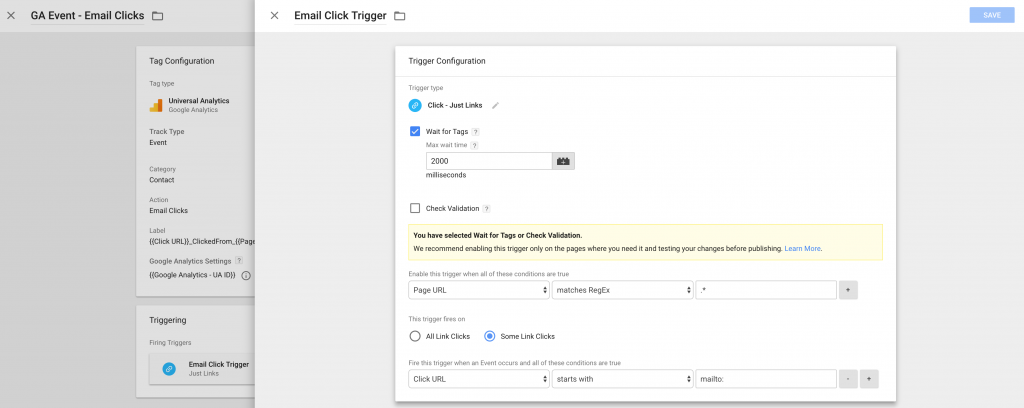
3. FIRE TAGS ON SPECIFIED TRIGGERS.
Once we have figured out what event parameters we want to send to Google Analytics we have to create conditions specifying when to send them. In our email click event example, we would fire the event trigger on all pages where a link is clicked with a URL that starts with “mailto:”

4. PREVIEW, DEBUG, AND PUBLISH YOUR CONTAINER.
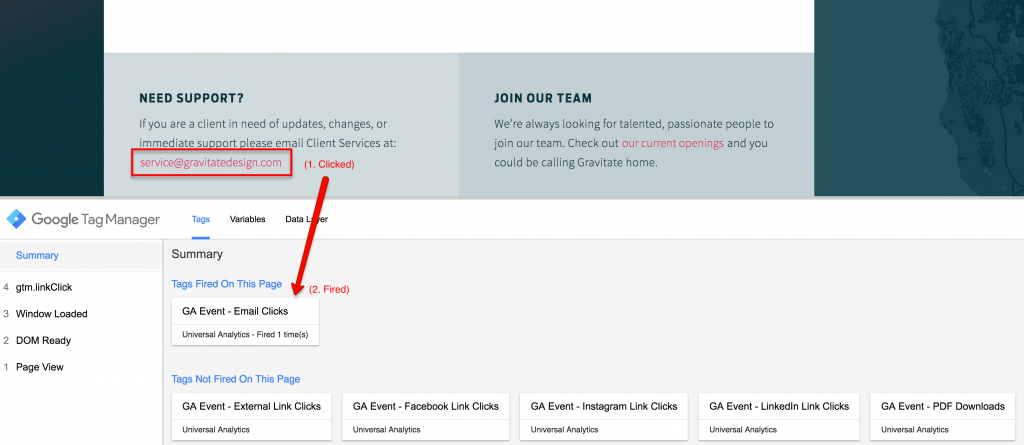
After confirming your event tag and triggers, we recommend putting Tag Manager in “Preview Mode” so you can debug and test your events with real-time tracking in Google Analytics. Once all of your events are firing correctly in your preview environment, you are safe to leave preview mode and publish your new Tag Manager container. Congratulations, you have now set up event tracking through Google Tag Manager!

Here is what the Tag Manager debug window looks like:

Here is what real-time tracking in Google Analytics looks like:
![]()
Google Tag Manager Event Tracking Template:
Gosh Steven, is there a way that I can take use of your event tracking setup instead of having to create all of the basic events myself?
Yes, yes you can. We have created a JSON export of what we consider to contain event tracking and Tag Manager basics (including a HotJar Tag). You will need to follow the following steps to get started:
- Download our GTM Event Tracking Template.
- Open the JSON file in a text/code editor (such as Atom) and follow the instructions closely at the top.
- Import the JSON file (container template) to your new or existing GTM container
- Override or merge the Tags into your container.
- Preview, Debug, and Publish your GTM container.
